Showing posts with label Main Dishes. Show all posts

Sunday, November 27, 2011

Baked Ziti


I have just been so neglectful of my little blog. I could make excuses about how busy life has been but really, I eat every day so how can I make excuses? I made some awesome foods for Thanksgiving so expect some new posts coming soon. Now onto the ziti!


I grew up in a town with a very large Italian population, so suffice it to say that going out for Italian food was a common occurrence in my childhood. I really missed stuffed shells until I found Rising Moon and ravioli until I found SoyBoy. I never found a store bought baked ziti so I had to find a way to make my own. Ok well I don't eat any of those very often but it is a special treat when I get some good old Italian pasta dishes.

This dish isn't necessarily fast but it's pretty easy. I make a big batch of vegan ricotta and use it for different dishes over the next 1 1/2-2 weeks.  That is probably the most time consuming item to make, aside from bake time.

For 2-4 Servings of Baked Ziti:

1 1/2-2 cups (dry) of cooked ziti pasta
8 oz Tomato Sauce (store bought or homemade)
6-8 oz Vegan Ricotta (see recipe below)
4 oz Daiya Mozzarella Cheese (or any brand that you like)
2 Tbsp Vegan Parmesan Cheese (1 part ground sesame seeds, 1 part nutritional yeast)


*Preheat your oven to 375F.
*Cook the pasta as directed on the package. Drain well and place in a medium mixing bowl. add in the tomato sauce, vegan ricotta, and vegan mozzarella. Mix well using a rubber spatula.
*Lightly grease/spray a baking dish and place the mixture into the dish.
*Sprinkle the vegan parmesan on top and bake for 25-30 minutes.

Vegan Ricotta 
1/2 cup Raw Cashews (soaked for a minimum of 2 hours to overnight)
1/4 cup fresh lemon juice (slightly less if bottled)
2 Tbsp Olive Oil
2 Cloves of Garlic
1 lb of Firm Tofu (I like the texture of Nasoya Light Firm Tofu for this recipe)
1 1/2 tsp dried basil
1 1/2 tsp salt

*In a food processor add the cashews, lemon juice, olive oil and garlic. Blend until creamy.
*Add remaining ingredients to food processor and blend until creamy again.
How easy is that?!

Friday, December 17, 2010

Savory Casserole

Tonight I just experimented in making a casserole, not measuring terribly carefully, and it turned out to be tremendous. I was not expecting that. So I will give you my approximations for measurements but I don't think it matters all that much. Aren't casseroles really just about throwing things you like, that go together, in a dish and baking it?  Also, in case you haven't noticed I really love mushrooms and onions. Like, a lot.
P.S. I'm noticing a pattern in my foods looking not so attractive but they taste so good.

Chopped Onions - approx 1/3 cup
Portobello Mushroom Slices - approx 1 cup
Tofu - approx 1/4 block
Nutritional Yeast - as much as you'd like, I used probably about 2 Tbsp
Vegan Cheddar Cheese - I used approx 1.5 oz Daiya
Dash of Salt for flavor
Seasoned Packaged Tofu Meat substitute - I used Field Roast Tomato Flavor slices (2) but it would work well with any "deli" slices, fakin bacon, or soysage just for a little flavor.

In frying pan with either nonstick spray or oil, saute the onions. After a few minutes add in the mushrooms and saute for a few more minutes. Crumble the tofu and toss into the pan along with the nutritional yeast, salt, and meat substitute. Saute for another minute or two. Toss in the vegan cheese, stir in quickly and move it right to the casserole dish. Sprinkle some vegan cheese on top if you like. Bake at 400 degrees Fahrenheit for about 15 minutes.

Tuesday, December 14, 2010

Watching It

I haven't fallen off the face of the earth; I'm still here. Through Thanksgiving I had been making loads of delicious foods for my little blog here but my hips can't take it anymore. So, I've started Weight Watchers. I've always been pretty against the program because they teach portion control (which I've never had a problem with) but they don't teach people how to become healthy eaters. A couple of weeks ago they changed their program and now most fruits and veggies are "free", meaning they don't come out of your daily points allocation. Now I'm giving it a try, we'll see how it goes. Let's face it, how many people want to see pictures of salads and not-so-attractive foods? I know I don't, so I haven't been writing. Today I decided to start it up again and I'm going to keep the posts to easy vegan meals but they'll be more healthy and I'll try to add in some fun extra things such as products that I like.

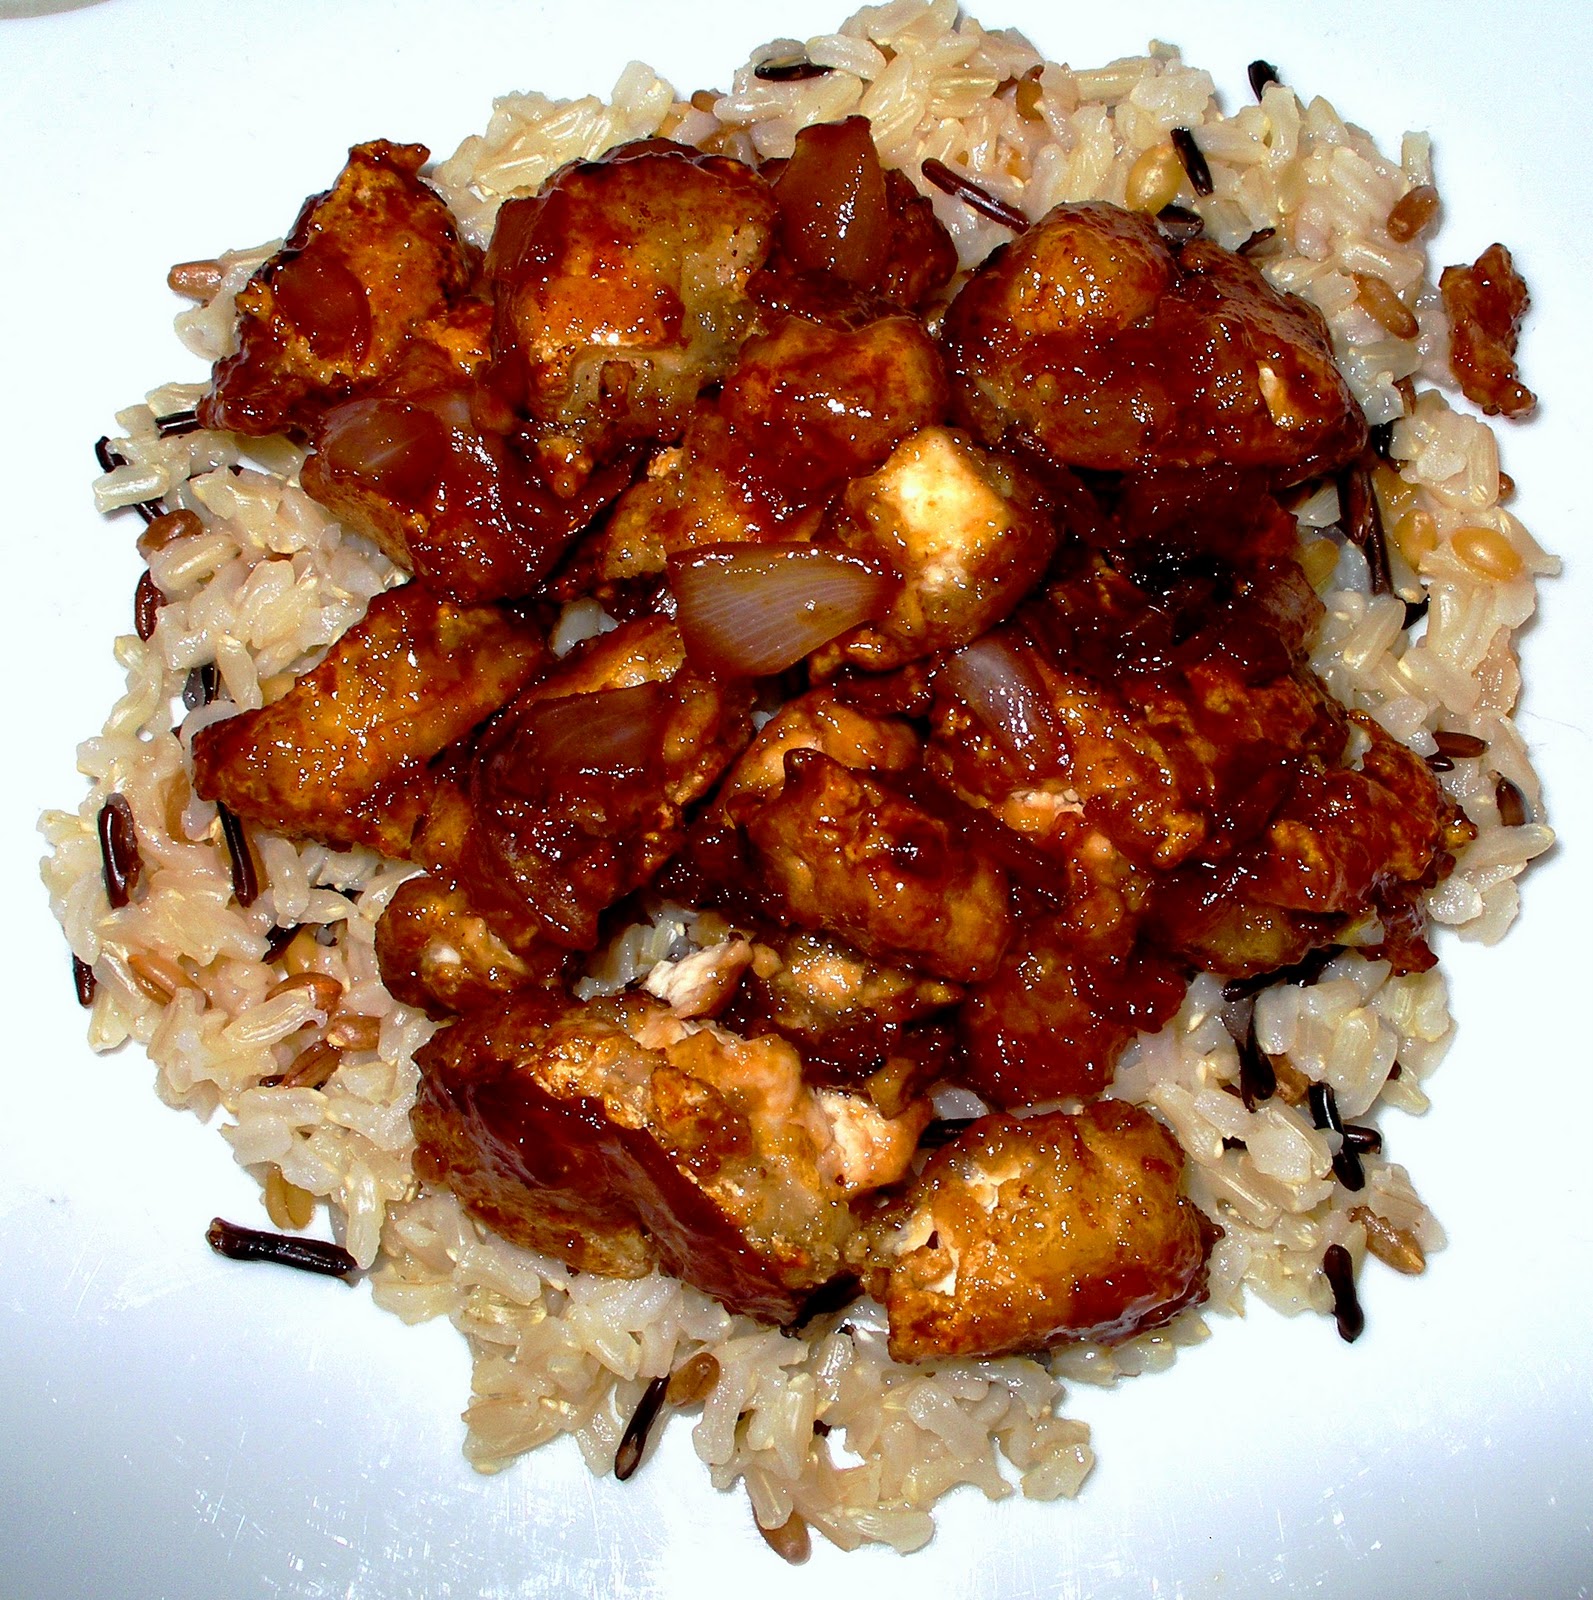
Recently I discovered the Gardein Mandarin Orange Crispy Chick'n. I know, I'm Gardein obsessed but some of the food is sooo good. This shicken is no exception.  Add some onions when grilling for a little and serve over a 1/4 cup of wild rice and you have a great meal (5 points for any of you other WW-ers out there). The whole thing takes no more than 10 minutes to make. I also try to make a bunch of rice at a time so that I have it cooked and waiting in my fridge. I threw my rice into the pan for the last 10 seconds or so and it turned out quite nice. The mandarin orange chick'n would be great in a stir fry as well. I find stir fry a little tough to do without oil so I've avoided it thus far but I'm sure I'll get there.

Tuesday, November 30, 2010

Dreamy Creamy Chick'n


Today is the last day of Vegan Mofo so it calls for a special dish. When I went to graduate school and lost my healthy eating habits, this was one of the dishes that I came up with for special occasions because it is just so over the top...but totally worth it. The pictures are old because I've only made it two or three times but you'll get the idea.

Ingredients
1 Package (4 pieces) of Gardein™ chick’n scallopini
¼ cup Tofutti® Better than Sour Cream 
  (Can be replaced with a ¼ cup ground cashews for a slightly healthier version)
¼ cup Soy Milk (I used Lite Original Silk)
¼ cup Nutritional Yeast (Amount can be cut down by up to half, depending on personal taste)
1 tsp Garlic Powder
1 tsp Onion Powder
Salt and Pepper to taste
4 oz Daiya Italian Blend /mozzarella style “cheese”™
 
Crispy Cheesy Garnish -  1 oz Daiya Italian Blend /mozzarella style “cheese”™

Directions
Slightly defrost Gardein™ chick’n scallopini so that it’s easier to work with; put in microwave for about 30 seconds. Set aside.
In a bowl, mix Tofutti® Better than Sour Cream, Soy Milk, Nutritional Yeast, Garlic Powder, Onion Powder, Salt and Pepper. (Add more Soy Milk for desired consistency)
Moderately coat the Gardein™ chick’n scallopini with the mixture. There will be a lot of the mixture left over to use as a sauce on final dish.
Press ½ oz of the Daiya cheese on each side of each “chick’n”.
Grease cookie sheet/oven tray and place the coated “chick’n” on the sheet.
Evenly place the 1 oz Daiya cheese on the tray as well in its own section so that it does not melt into the chick’n. (or place on separate tray)
Bake at 350⁰ for 10 minutes, flip “chick’n”. Remove the Crispy Cheesy Garnish when it stops bubbling and starts browning.  Bake the “chick’n” for another 5 minutes. (Time/Temperature may need to be adjusted depending on your oven, mine cooks particularly hot.)
Remove “chick’n”, place on plate, spoon remainder of sauce over “chick’n”.  (sauce can be used hot or cold)
Place Crispy Cheesy Garnish on the “chick’n” and serve. 

Notes
If using cashews in place of Tofutti® Better than Sour Cream, grind in food processor. Heat soy milk and mix the sauce in the blender rather than a bowl.
The dish is very creamy. The amount of Daiya can be reduced or the dish can be made without the Daiya at all if it is too creamy for your taste.
Ground sesame seeds can be added for a slightly more “Parmesan” taste. Soy milk will need to be increased. 

Thursday, November 18, 2010

Thanksgiving Part 2: Better Than Turkey

It is incredibly easy to make all of the traditional Thanksgiving side dishes vegan. My mom has been doing it for years and many of the dishes were already vegan. For many, if not most, veg*ns (vegetarians and vegans) there is no way we're going to take part in eating a poor little tortured turkey. Ok guilt trip over. So what's a veg*n to do on Thanksgiving?  Here are some main course dishes that will please any vegan. I was careful to pick not only some of the most popular dishes but only those whose recipes are available for free. Also, I don't have the rights to post any of these pictures (sorry) so you're going to have to click on the links to see them.

First up is the Tofurkey Holdiay products. This is pre-made and available in most supermarkets. It travels very well and is quite possibly the easiest thing to make, ever. It's been a few years since I've made a Tofurkey so it may have changed but it comes in the shape of a little football. You put the roast on a tray, pop it in the oven, bake and remove. That's it. The stuffing is inside and it comes with gravy. If you are hopeless in the kitchen or are traveling, this might be your best way to go.

Next up are the store bought roasts such as the Field Roast brand Celebration Roast (click the link on the left, 2nd one down labeled Celebration Roast) and the Match® Premium Vegan Stuffed Holiday Roast. You can do anything you want with these roasts. You can shape them, stuff them, bread them, or just serve with gravy.

Here are two favorite "from scratch" recipes. PPK chickpea cutlets and Whole Foods Market's Celebration Lentil Loaf. Both are at a moderate level of difficulty. If you are a decent cook then you can make these. I don't know how the Whole Foods Lentil Loaf tastes but the chickpea cutlets seem to be loved by all.

Finally, if you're feeling ambitious or are already a good cook, here's something for you to try. Last year vegan.com featured Robin Robertson's Thanksgiving menu. His main course was Seitan en Croute with Madeira Sauce. There are many Seitan en Croute recipes out there, all you have to do is a search to find them.

I'm leaning towards either Robin's Seitan en Croute or the PPK chickpea cutlets for my Thanksgiving menu. I will post pictures after Thanksgiving.

Monday, November 8, 2010

Go Nuts

(just be glad I didn't make a Peas in a Can joke)

Pecan Crusted Chick'n Cutlets


The first time I had pecan crusted tofu was at Blossom in NYC. It was served with a cashew cream sauce and it was so good I didn't know what to do with myself. The skies opened up, sunbeams shone through the clouds onto the plate and angels began to sing (or whatever it is that angels do). So I ate the whole thing.

Ever since then I have been obsessed with pecan crusted tofu which just so happens to be a staple at health food stores, in my experience anyway. I buy it on occasion but this is the first time I made it myself and it tasted much better than the stores but not quite at Blossom level (although that could be due to the lack of cream sauce).

It sounds complicated but really the whole thing took about 10-15 minutes excluding defrosting time.

Here's how I did it...

Ingredients
2 defrosted chick'n cutlets (I used Gardein, I would imagine you could use seitan or tofu as well)
1/3 cup of unbleached-all purpose flour
1/4 cup of soy milk (I used Lite Silk)
          (Option: egg replacer or flax powder mixed in water should work as well)
1/4 cup of pecans
1/4 cup of panko bread crumbs (I would think any unseasoned bread crumbs would work)
Dash of nutmeg (optional)
Pinch of salt and pepper
1-2 Tbsp olive oil for pan frying (next time I make this I'm going to try baking it)
  • Crush the pecans finely. I crushed them by hand in a mortar and pestal but a coffee/spice grinder will work too.

  • Then I laid out one plate and two shallow bowls/dishes.
    • Spread the unbleached-all purpose flour on the plate.
    • Pour the soy milk one of the shallow bowls/dishes.
    • In the last bowl/dish, mix the crushed pecans, breadcrumbs, nutmeg, salt and pepper until well incorporated.
  • Take your cutlets and dredge in the flour until it is fully covered. Then dip in the soy milk until the whole cutlet is covered in both the flour and soy milk. Finally press the cutlets into the pecan/bread crumbs mixture, ensuring that the entire cutlet is fully covered in the mixture.
  • Heat your oil in a pan and place the cutlets in the pan.
    • Flip after a few minutes when each side is browned.

Serve up this nutty goodness on a special occasion or as a well deserved treat.

Enjoy!

Saturday, November 6, 2010

I’ll Have Some Carbs With That

Mashed Potato Pizza (Personal Size)

Preface Part 1: New Haven’s Apizza 

Recently I finished my Masters degree in New Haven which is a small city in Connecticut. If you know anything about New Haven you know it is famous for its pizza. Student food habits in grad school are, well, not so different from those of students in college.  With all of that information you now know that grad students in New Haven eat LOTS of pizza. Why am I telling you all of this? 

As a vegan I clearly didn’t eat pizza with my cohorts but I did listen to them talk about eating pizza quite a bit. Apparently in one New Haven apizza you can order something called Mashed Potato Pizza. I have never seen it but I pictured it in my head many a time.

Preface Part 2: MoFo Iron Chef

I have been following Vegan MoFo around the web and came across a game that some of the bloggers are playing which is a take-off on the Iron Chef television series. Of course I’ve heard of Iron Chef but I’ve never seen it so I looked it up. Basically the person running the game/program gives the chefs an ingredient and the chefs need to come up with the best dish utilizing that ingredient. Vegan MoFo Iron Chef’s week 1 ingredient is Mashed Potatoes. 

I think I’ve only ever made mashed potatoes once in my life.  Don’t get me wrong, I love potatoes in any format but, like many people, I love starches so I try to cut back in easy/obvious places. Potatoes are one of those places. Having little experience with mashed potatoes was what made me take the leap into joining in on the Iron Chef fun.

Preface Part 3: Put it all together and what do you get?
I made Vegan Mashed Potato Pizza. Adoi
______________________________________________

Recipe Part 1:  The Crust 

I made vegan Pizza in my first post and I used the same crust for this recipe.
 
1/4 tsp yeast
2 Tbsp warm water
1/4 tsp salt
1/4 tsp granulated vegan sugar
1 Tbsp warm water
1 tsp olive oil
1/2 c flour
(optional: corn meal…cause I’m from NY)

In a big bowl mix the yeast with the 2 tbsp warm water. Set aside for a few minutes. In a small bowl mix the salt, sugar, and 1 tbsp warm water. Add the salt/sugar mixture and olive oil into the big bowl. Stir to combine as well as possible. Add in flour and knead. If all of the flour isn't sticking you may need to add more water. A little water goes a long way. Cover the bowl with a wet dish towel or piece of saran wrap. Let stand for about an hour.

When you’re ready to assemble the pizza, toss a little corn meal on your rolling surface to keep the dough from sticking to it. Roll out the crust and roll the edges to make the crust. Brush a little olive oil on the pizza crust.

Recipe Part 2: Mashed Potatoes

3-4 Baby Red Potatoes (or similar size baking potato)
¼ tsp pressed garlic
1 tbsp vegan margarine (I used Earth Balance)
1 tbsp vegan sour cream (I used Tofutti)
¼ tsp rosemary
¼ tsp salt
¼ tsp onion powder
Very small dash of Dill (optional)

Peel and cut the potatoes into large chunks. Boil the potatoes in water for 15-20 minutes and drain. Place the potatoes back in the pot and mash with a potato masher or fork. Add the rest of the ingredients and mix thoroughly. Refrigerate to cool potatoes down before adding to the pizza.

Recipe Part 3: The Final Steps

Preheat your oven to 400°F. Once you have your crust rolled out, spread a layer of the mashed potatoes on the pizza.


Sprinkle your favorite vegan cheese on top.


Place the pizza on your stone or cookie sheet and place in the oven for about 20 minutes. Keep in mind each oven is different so start checking back on your pizza after 15 minutes.

Slice and Enjoy!


P.S. I wanted to wait until I was done to find out what the New Haven Apizza version of Mashed Potato pizza is. You know, the one my friends ate all the time.  I couldn't find any info online so I'll have to call a friend up to get the info. Will post back when I know more. Can't wait to see how it compares to my creation!

Thursday, November 4, 2010

Healthy Chick'n and Rice


This is one of my staple dishes. It's low fat, high protein, and the right kind of carbs.  Pair it with your favorite steamed veggies and you have a great, healthy meal that cooks up in just minutes.  The recipe below is for one serving, you can easily multiply it by the number of servings that you need.

For each serving:
1/8 cup wild rice DRY (approximately 80 calories)
     - Of course you can use brown rice but I would stay away from white rice because it has little (if any) good nutritional value.

     - Cook the rice according to the directions on the package. I tend to start this as soon as I get home from work because in general, the longer it takes to cook the rice as stated on the package, the better the rice is for you.

Ingredients:
1 Chick’n cutlet of your brand of choice 
    - (I use Gardein chick’n scallopini – 90 calories, 2g fat, 14 g protein)
¼ vegetable bouillon cube or approximately 1/3-1/2 cup of vegetable stock
1 tsp vegan margarine (I use Earth Balance)
    - This adds about 3 grams of fat to the dish. In my opinion it is well worth it but you can leave it out if that is a major concern for you.
Splash of lemon juice
Dash of garlic powder

Optional: Lightly flour the chick’n cutlet.  Fry in a pan with about a tablespoon of oil. Of course it is tasty but I usually leave this part out when watching my waist-line. It’s a nice option if you’re cooking a special dinner for people.

Take the chick’n cutlet and place in a nonstick pan, flipping to heat each side. If you want you can add some olive oil to the pan to cook the cutlet in. When cooked through, set the cutlet aside on a plate.

Use the same pan and pour in your vegetable stock – or – ¼ bouillon cube + ¼ cup of water.  Boil the stock/cube down until the water has mostly disappeared and you’re left with a thicker brown “sauce”.

Turn the heat down to low. Add in your margarine, dash of garlic powder and a splash of lemon juice.
-        A note on garlic powder: most people are appalled that I use garlic powder instead of fresh garlic. Aside from it being easier…no cutting, no extra knives and dishes to wash, etc…garlic burns so easily. It tastes nice if it’s sautéed in oil but that’s just extra fat and calories, and of course extra effort!  So it’s not the worst thing in the world if you get home from work and want to use powder,  instead of fresh, that requires no effort, really, it’s not.

In a few seconds the margarine will be melted. Mix everything in the pan so that it is all incorporated well. Put your cutlet back in the pan and let it sit on each side for a little bit (maybe 30-60 seconds) to get some flavor into the cutlet.

This whole process (aside from the rice) takes about 10 minutes.

Take your fully cooked rice and place it on your plate. Take the cutlet and place it on top of the rice. Pour the remainder of your sauce over the chick’n and rice to let the rest of the sauce absorb a little bit into the rice.

Eat and enjoy!

Friday, October 29, 2010

Give the Delivery Guy the Night Off

General Tso's Tofu


This is probably the most complex recipe that I make and I only make it once every couple of years.  It's not low fat or low carb but I'm sure it's a lot better for you than any General Tso's Tofu/Chicken you would get at a Chinese food restaurant. You control how much oil and corn starch you want to use. If you don't mind the tofu being less crispy you can cut back on the corn starch. I like this dish with wild or brown rice.

To make the Tofu
1 package of Lite Firm Tofu (any kind of firm tofu will do)
1 egg replacer (Ener-G (preferred) or flax powder)
Canola Oil for pan frying (any kind of oil that doesn't have a strong flavor will do)
3/4 cup corn starch
  • Drain the tofu. To make tofu "meatier" you can drain the package of tofu and leave it in your refrigerator uncovered overnight. 
  • Mix the egg replacer powder with approximately 1/4 cup of water in a medium bowl.
  • Cut the tofu into chunks and toss it in the egg replacer mix. 
  • Coat the tofu (covered in the egg replacer mix) with the corn starch.
  • Heat up some oil in a pan and fry the tofu until it is golden brown.
  • Set aside…

To make the Sauce
3 tbsp Canola Oil (again, any kind of oil that doesn't have a strong flavor will do)
3 cups of chopped onions
1-2 cloves of garlic, chopped
1 tsp powdered ginger
½ vegetable bullion cube
3 tbsp soy sauce
3 tbsp brown sugar
1 tbsp white/apple cider/rice vinegar
1 tbsp corn starch
Optional: add in some peppers if you like it a little spicier

  • Heat oil in a large pan and add onions, garlic, and ginger.
  • Saute for a few minutes and then add in soy sauce, bullion cube, brown sugar, and vinegar.
  • In a small bowl thoroughly mix the corn starch with a tablespoon of water then add to the pan.
  • Keep stirring the sauce mixture until you get a thicker consistency.
  • Add the tofu that you fried up earlier to the sauce and mix thoroughly.
Serve it up and Enjoy!