Tuesday, November 30, 2010

Dreamy Creamy Chick'n


Today is the last day of Vegan Mofo so it calls for a special dish. When I went to graduate school and lost my healthy eating habits, this was one of the dishes that I came up with for special occasions because it is just so over the top...but totally worth it. The pictures are old because I've only made it two or three times but you'll get the idea.

Ingredients
1 Package (4 pieces) of Gardein™ chick’n scallopini
¼ cup Tofutti® Better than Sour Cream 
  (Can be replaced with a ¼ cup ground cashews for a slightly healthier version)
¼ cup Soy Milk (I used Lite Original Silk)
¼ cup Nutritional Yeast (Amount can be cut down by up to half, depending on personal taste)
1 tsp Garlic Powder
1 tsp Onion Powder
Salt and Pepper to taste
4 oz Daiya Italian Blend /mozzarella style “cheese”™
 
Crispy Cheesy Garnish -  1 oz Daiya Italian Blend /mozzarella style “cheese”™

Directions
Slightly defrost Gardein™ chick’n scallopini so that it’s easier to work with; put in microwave for about 30 seconds. Set aside.
In a bowl, mix Tofutti® Better than Sour Cream, Soy Milk, Nutritional Yeast, Garlic Powder, Onion Powder, Salt and Pepper. (Add more Soy Milk for desired consistency)
Moderately coat the Gardein™ chick’n scallopini with the mixture. There will be a lot of the mixture left over to use as a sauce on final dish.
Press ½ oz of the Daiya cheese on each side of each “chick’n”.
Grease cookie sheet/oven tray and place the coated “chick’n” on the sheet.
Evenly place the 1 oz Daiya cheese on the tray as well in its own section so that it does not melt into the chick’n. (or place on separate tray)
Bake at 350⁰ for 10 minutes, flip “chick’n”. Remove the Crispy Cheesy Garnish when it stops bubbling and starts browning.  Bake the “chick’n” for another 5 minutes. (Time/Temperature may need to be adjusted depending on your oven, mine cooks particularly hot.)
Remove “chick’n”, place on plate, spoon remainder of sauce over “chick’n”.  (sauce can be used hot or cold)
Place Crispy Cheesy Garnish on the “chick’n” and serve. 

Notes
If using cashews in place of Tofutti® Better than Sour Cream, grind in food processor. Heat soy milk and mix the sauce in the blender rather than a bowl.
The dish is very creamy. The amount of Daiya can be reduced or the dish can be made without the Daiya at all if it is too creamy for your taste.
Ground sesame seeds can be added for a slightly more “Parmesan” taste. Soy milk will need to be increased. 

Sunday, November 28, 2010

Vegan Thanksgiving Round-Up

I hope everyone enjoyed their Thanksgiving, regardless of what you were doing or who you were with. My family was giving me a hard time about taking the foodie pictures so I had to snap a couple of pics very quickly on the sly and they didn't always turn out well. So, I apologize in advance for some of the pictures. Here was my Vegan Thanksgiving...

First, I made bread


Two main courses:
Seitan en Croute with Madeira Sauce


and Vegan Dad's Maple Apple Cider Tofu with Stuffing (although I just used my cranberry sauce as a topping instead of his chutney which looks delish).

I have to say, this was absolutely amazing. I will definitely be making it again!

Cranberry Sauce


Sweet Potatoes (which were made by my mom) with Glazed Pecans that I jarred.

And for Dessert...

My famous apple pie. Quite frankly, the pictures don't do it justice. I'm just sayin.


and Pumpkin Bread


I hope you enjoyed seeing what I ate as much as I enjoyed eating it. My family ate everything except my main course. My weight watchers devotee mamma made some grilled asparagus that was vegan but I don't have any pix.  Hey, it's a start!

Wednesday, November 24, 2010

Thanksgiving Part 5: Sides

Traditional Thanksgiving sides are really easy to make vegan.

Substitutes:

Butter == Earth Balance
Chicken stock == Vegetable stock OR there are vegetarian bouillon cubes that are meant to taste like chicken stock
Sausage == vegetarian sausage such as Lightlife Smart Sausage
Sour Cream == Tofutti Sour Cream (I use this for dip)
Marshmallows == Dandies (taste like store bought marshmallows) or Sweet and Sara marshmallows (taste more like homemade marshmallows)
    *I will be putting glazed pecans on my sweet potatoes instead of
      marshmallows. They're incredibly easy to make.

If there's anything that I left off the list, please feel free to leave a comment and I will do my best to get back to you with a veg*n substitute.

Here's a recipe for a delicious cranberry sauce that I made yesterday for my family's Thanksgiving.

APPLE CIDER CRANBERRY SAUCE

12 oz Cranberries
1 cup of Vegan Granulated Sugar
1 cup of Apple Cider
Clementine zest and approximately 1-2 tbsp Clementine juice


In a sauce pot over medium heat, combine a dash of clementine zest and juice, cider, and sugar. When the sugar is dissolved stir in the cranberries. You will know the sauce is done when all of the cranberries pop. It usually takes 10-12 minutes.

Really I just wanted to do something a little more exciting than the traditional sugar/water/cranberries - cranberry sauce. I <3 apple cider and thought it would be a good combination. A lot of people will use orange juice instead of water so it occurred to me that a bit of clementine would be a nice touch.

Stay tuned for my Thanksgiving round-up after the dinner.

Have a Happy Thanksgiving!

Saturday, November 20, 2010

Thanksgiving Part 4: Desserts (part deux)

I mentioned in my last post that I make apple pie every Thanksgiving. You'd have to kill me to get my apple pie recipe. However, I can give you some tips on pie crusts that you can use on any pie and tips on making apple pies. You can use the crust for pecan pie, pumpkin pie, or any other pie that you'd like to make this holiday.

A few quick tips on apple pie. First, use more tart apples. I know, it's counter intuitive but sweet apples are just not as good in pies as tart apples are. Second, and this is probably a matter of personal preference, slice your apples thin. If your recipe calls for an apple cut into 1/8ths, cut them into 1/16ths. If you're using an apple corer you can slice through once, hold the apple together with your hand and then shift the corer to split the slices in half (but move your hand before you press down on the corer again). My final tip for apple pie is that crumb top pies always seem to be much more loved than the traditional pies. Use Earth Balance for your crumb top instead of butter. I will admit it takes a bit longer but it's worth it to keep the pie vegan.

On pie crusts... pie crusts always have 3 or 4 basic ingredients so there's nothing super special that you can put in them to make them more awesome than the next crust. So why do some taste so much better than others? It's all in the technique. First, keep the water and the margarine ice cold. Second, when mixing the dough don't mix thoroughly. Keep chunks of margarine something along the size of a walnut. Third, once you've mixed the dough (not thoroughly), wrap it up and refrigerate it for about 30-45 minutes to let it settle. My final tip is that if you're new to making pie crusts from scratch you should look for a step by step instructional video online. I'm sure there are a zillion out there.

Stay tuned, post-Thanksgiving you'll see pictures of my apple pie in my fancy new pie dish.

Thanksgiving Part 3: Desserts

Desserts are my favorite part of Thanksgiving! Shocker, I know. I'm not much of a cook but I'm a terrific baker if I do say so myself. Sure I've experimented with a recipe or two that hasn't turned out well and then didn't have the time to make something new so I served it anyway :) Some of you may have been fortunate enough to be the recipient of those dishes. But I digress.

For a number of years now I have been in charge of Thanksgiving dessert at my house and everyone happily gobbles up my vegan treats. Apple pie and apple cake are traditions at our holiday meal but I usually try to add something else to the mix. I have been debating, for a while now, what my new dessert will be this Thanksgiving and I think I've found it.

Yesterday I went to Michaels to see if I could come up with something I wanted to package cookies in for holiday host(ess) gifts...and then I ended up buying half the store. Isn't that the way every trip to Michaels goes? This trip I ventured into a section of the store that I avoid like the plague at this time of the year, the Seasonal section. *queue the horror movie music*   I guess they're already looking to get rid of the Thanksgiving gear!? Probably because Christmas prep starts in September now. I found a super sweet fall red ceramic pie dish and almost wanted to die. Then I came across the cutest 5"x3" ceramic loaf dishes in fall colors. They were $1. Yes, $1. There's nothing that I like better than a good bargain. So I bought three of them, one brown, one yellow, and one green. I would imagine there were other colors but this is what was left at my store. I decided that I would use them to make mini loaves of bread instead of rolls. THEN I decided that I would also use them to make a dessert, Pumpkin Bread!

I came home and found a recipe for the bread so I decided to do a little test run. I cut the recipe by 4, which actually turned out to be too much for the loaf dish, I should have cut it by 5. After I made it I thought this would be a great option for people who don't like their desserts too sweet.


And for those that do like their desserts sweet, a simple sugar glaze on top will do. You can use a small amount of tofutti cream cheese or margarine and soy milk, and lots of powdered sugar.
EXTREME CLOSE-UP!

Stay tuned for Desserts Part Deux....

Thursday, November 18, 2010

Thanksgiving Part 2: Better Than Turkey

It is incredibly easy to make all of the traditional Thanksgiving side dishes vegan. My mom has been doing it for years and many of the dishes were already vegan. For many, if not most, veg*ns (vegetarians and vegans) there is no way we're going to take part in eating a poor little tortured turkey. Ok guilt trip over. So what's a veg*n to do on Thanksgiving?  Here are some main course dishes that will please any vegan. I was careful to pick not only some of the most popular dishes but only those whose recipes are available for free. Also, I don't have the rights to post any of these pictures (sorry) so you're going to have to click on the links to see them.

First up is the Tofurkey Holdiay products. This is pre-made and available in most supermarkets. It travels very well and is quite possibly the easiest thing to make, ever. It's been a few years since I've made a Tofurkey so it may have changed but it comes in the shape of a little football. You put the roast on a tray, pop it in the oven, bake and remove. That's it. The stuffing is inside and it comes with gravy. If you are hopeless in the kitchen or are traveling, this might be your best way to go.

Next up are the store bought roasts such as the Field Roast brand Celebration Roast (click the link on the left, 2nd one down labeled Celebration Roast) and the Match® Premium Vegan Stuffed Holiday Roast. You can do anything you want with these roasts. You can shape them, stuff them, bread them, or just serve with gravy.

Here are two favorite "from scratch" recipes. PPK chickpea cutlets and Whole Foods Market's Celebration Lentil Loaf. Both are at a moderate level of difficulty. If you are a decent cook then you can make these. I don't know how the Whole Foods Lentil Loaf tastes but the chickpea cutlets seem to be loved by all.

Finally, if you're feeling ambitious or are already a good cook, here's something for you to try. Last year vegan.com featured Robin Robertson's Thanksgiving menu. His main course was Seitan en Croute with Madeira Sauce. There are many Seitan en Croute recipes out there, all you have to do is a search to find them.

I'm leaning towards either Robin's Seitan en Croute or the PPK chickpea cutlets for my Thanksgiving menu. I will post pictures after Thanksgiving.

Wednesday, November 17, 2010

Thanksgiving Part 1: Rise Up!

Irresistible Bread


Not having a laptop for a week means that I have a few recipes built up to share. I've put them all aside seeing as Thanksgiving preparations in my house are about to start. While holidays mean elaborate recipes and tons of food, sometimes you can get away with an easy to make dish that wows the crowd. This week I hope to bring you some recipes for the holidays that are either easy recipes or take a bit more effort but can be made by anyone. Hopefully this week we'll find a way to reinvent Thanksgiving to spare as many turkeys as possible.


This recipe has been a favorite of mine for many years. It was posted on vegweb which is pretty much where I got my recipe collection start. I altered the recipe a bit but not much. It is hard to mess this up and it is a crowd pleaser for sure.  Sometimes I even add some herbs like rosemary or tomato & basil to this recipe to make some savory rolls. This bread recipe can be used to make rolls and loaves of bread. It's a great all-purpose, base bread recipe. It's so simple, anyone can do it.

1 1/2 tsp instant yeast
2 Tbsp warm water (warm! not hot. hot water will kill the yeast)


1 1/2 Tbsp granulated sugar
1/2 Tbsp salt
1 cup of hot water

1 cup of whole wheat flour (you can replace this with all-purpose or bread flour if you like)
2 cups of all-purpose or bread flour
2 1/2 Tbsp olive or canola oil

In a small bowl, mix the yeast and warm water. Set aside until it looks foamy.

In your large mixing bowl mix the sugar, salt, and hot water. Once the yeast is foamy and the sugar and salt have started to dissolve you can pour the yeast mixture into the large mixing bowl. Mix it up a little bit.

Mix in the whole wheat flour until well combined. Add the oil and combine again. Add the remaining flour and knead for a couple of minutes.

Place the dough back in the large bowl and cover with a damp kitchen towel or saran wrap. Set aside for 1-2 hours (or longer, no rush). The dough should rise noticeably.

Once the dough has risen, knead for a minute.

-If you are making rolls: tear off the dough into pieces a little smaller than the size you would like your rolls to be. Place the rolls on a very lightly greased cookie sheet. A cooking spray will work nicely here.
-If you are making bread: split the dough in half and place each half in it's own average size bread pan.

Cover the cookie sheet or bread pan and let the dough rise again for at least an hour.

Preheat your oven to 450 degrees Fahrenheit. Baking time will depend on your oven and whether you chose to make rolls or loaves of bread. It takes me about 10 minutes to bake rolls and 30-45 minutes for a loaf of bread.

TIP: I believe it is always best to set your timer for about 20% less time than any recipe calls for and just keep watch on it for the last bit of time necessary. It's easier to add cooking time to your dish than to try and un-burn it, if that's even possible.

It looks like a lot of instruction but it is really incredibly easy. It takes almost no prep time but leave lots of extra time to let the dough rise.

Bake and Enjoy!

Tuesday, November 16, 2010

MiniBon

Mini Cinnamon Buns

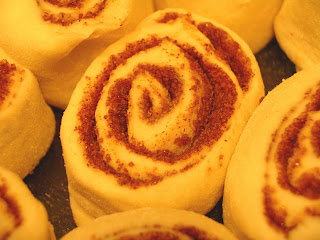
Once every 2 years or so I get a craving for a cinnamon bun and recently I had one. But, as we know, I cannot afford to eat an entire giant cinnamon bun. So I decided to attempt a mini cinnamon bun.

Since I have little experience making cinnamon buns I used the recipe from Love Like a Vegan but quartered the recipe. I rolled the dough out much thinner than the recipe calls for and it made 10 delightful mini buns. You have to read through the post to get to the best part at the end...

1/2 tsp heaping instant yeast
2 Tbsp unbleached sugar
1/4 cup lite original silk (or your choice of non-dairy milk)
1/2 egg worth of egg replacer OR 1/2 T ground flaxseeds whisked together with 6 T hot water
1 1/2 Tbsp Earth Balance margarine, melted
1 cup + 2 tbsp unbleached flour
1/4 tsp salt

1/4 cup brown sugar, packed
2 tsp ground cinnamon
1 1/2 Tbsp Earth Balance margarine, melted

Frosting
3/4 oz of Tofutti Better Than Cream Cheese
1 Tbsp Earth Balance margarine, softened
6 Tbsp powdered sugar
1/8 tsp vanilla extract
pinch of salt
2 Tbsp soy milk

Instructions:
Mix yeast, sugar, and heated soymilk in a large mixing bowl and let stand until foamy.

Add egg replacer, melted margarine, flour, and salt. Mix well and knead for 5-10 minutes (um, I did it for like a minute). The dough should be firm and smooth, not sticky. Set the dough aside in a covered bowl and let double in size.

After the dough has doubled-ish, turn it out onto a floured work surface, cover, and let rest for 10 more minutes.

Meanwhile, in a small bowl, combine brown sugar and cinnamon.

Roll dough into approximately 16×21 inch rectangle or possibly smaller. Spread dough with margarine and sprinkle evenly with sugar/cinnamon mixture. Roll up dough and cut into 10 sections with a sharp knife.


Place rolls on a lightly greased 9×13 inch cookie sheet. Cover and let rise until nearly doubled, about 30 minutes. Meanwhile, preheat oven to 400 degrees F.

Bake rolls in preheated oven until golden brown, about 15 minutes. While rolls are baking, beat together Tofutti, margarine, powdered sugar, vanilla, and salt. Spread frosting on warm rolls before serving.

Lazy? Short on time? The funniest recipe I ever found on vegweb was for a lazy-man's cinnamon bun. Someone posted a recipe that basically stated you need to cut the crust off a piece of bread, flatten the bread, spread margarine on it, sprinkle cinnamon and sugar on the margarine, roll it up and microwave the little bun. I did it and it's actually not bad! It's not a cinnamon bun but you get the same flavors. It's a quick and fun treat.

Friday, November 12, 2010

Kids, Don't Try This at Home

So my HP computer crapped out for the zillionth time and I have been sans-computer for the past few days. (P.S. don't buy an HP computer, ever).  The point being that I have to make this post quick and I can't upload any photos.


This Thanksgiving Turkey Cake (non-vegan) has been making it's way around the vegan world. I mean I don't even know what to say about this thing. There are just so many things wrong with it. SO MANY. But the shockingly odd photos have caused enough vegans to not be able to look away that there are people who are trying to veganize it. Why? I don't know. All I know is that I can't wait to see the results!

Tuesday, November 9, 2010

Top That, Stop That

Savory Cashew Cream Sauce

1. Why did they stop showing Teen Witch at Halloween?
2. I don't know if this is a cop out post but I'm doing it anyway.
3. I like counting.

In my opinion cashew cream sauce is a common sauce used in vegan cooking and usually one of the first that a new vegan learns to cook. It's crazy easy to make.

For this recipe you need a coffee grinder. A word on coffee grinders...this is one of those appliances that's totally worth having in your house, even if you're not a coffee drinker. They're cheap and small and make a world of difference when it comes to making fresh foods. Use one to grind spices, nuts, seeds, etc. into a fine powder for sauces and other recipes that might call for finely ground items.

Ingredients
1/2 cup of unsweetened soy milk
1/2 cup of water
2 tbsp nutritional yeast
1/4 cup of ground cashews (grind into a powder in your coffee grinder)
A pinch of salt and pepper

In a small pot bring the soy milk, water, and nutritional yeast to a boil. Whisk in the ground cashews and add the salt and pepper.


Boil down until it is at a slightly more liquid state than you would like it. Take the pot off the heat and when the sauce cools it will thicken.

I used it to top off one of the pecan crusted cutlets that I made yesterday. Yum!

Monday, November 8, 2010

Go Nuts

(just be glad I didn't make a Peas in a Can joke)

Pecan Crusted Chick'n Cutlets


The first time I had pecan crusted tofu was at Blossom in NYC. It was served with a cashew cream sauce and it was so good I didn't know what to do with myself. The skies opened up, sunbeams shone through the clouds onto the plate and angels began to sing (or whatever it is that angels do). So I ate the whole thing.

Ever since then I have been obsessed with pecan crusted tofu which just so happens to be a staple at health food stores, in my experience anyway. I buy it on occasion but this is the first time I made it myself and it tasted much better than the stores but not quite at Blossom level (although that could be due to the lack of cream sauce).

It sounds complicated but really the whole thing took about 10-15 minutes excluding defrosting time.

Here's how I did it...

Ingredients
2 defrosted chick'n cutlets (I used Gardein, I would imagine you could use seitan or tofu as well)
1/3 cup of unbleached-all purpose flour
1/4 cup of soy milk (I used Lite Silk)
          (Option: egg replacer or flax powder mixed in water should work as well)
1/4 cup of pecans
1/4 cup of panko bread crumbs (I would think any unseasoned bread crumbs would work)
Dash of nutmeg (optional)
Pinch of salt and pepper
1-2 Tbsp olive oil for pan frying (next time I make this I'm going to try baking it)
  • Crush the pecans finely. I crushed them by hand in a mortar and pestal but a coffee/spice grinder will work too.

  • Then I laid out one plate and two shallow bowls/dishes.
    • Spread the unbleached-all purpose flour on the plate.
    • Pour the soy milk one of the shallow bowls/dishes.
    • In the last bowl/dish, mix the crushed pecans, breadcrumbs, nutmeg, salt and pepper until well incorporated.
  • Take your cutlets and dredge in the flour until it is fully covered. Then dip in the soy milk until the whole cutlet is covered in both the flour and soy milk. Finally press the cutlets into the pecan/bread crumbs mixture, ensuring that the entire cutlet is fully covered in the mixture.
  • Heat your oil in a pan and place the cutlets in the pan.
    • Flip after a few minutes when each side is browned.

Serve up this nutty goodness on a special occasion or as a well deserved treat.

Enjoy!

Sunday, November 7, 2010

Bring me my Ranch Dressing hose

Vegan Ranch Dressing


I am a huge Simpsons nerd. Which has nothing to do with ranch dressing except for the line that, while in a carbon monoxide induced speech in Flanders' car during a snow storm, Homer spouts, "bring me my ranch dressing hose". The end.

I have been working for some time on figuring out how to make a great vegan ranch dressing. I have some other tricks up my sleeve that I want to try but it's pretty good and I'm not sure I'm going to do any better. Here is my best effort to date.


2/3 cup vegan “Sour Cream”

1 tsp onion powder

1 tsp garlic powder

½ tsp dill

1 tbsp parsley

1 tbsp red wine or balsamic vinegar

salt & pepper to taste

2-4 tbsp unsweetened soy milk (amount depends on how thick/thin you like your dressing)


Mix all ingredients together except for the soy milk. Once all ingredients are mixed, add soy milk until the dressing reaches the desired consistency. Here's an important part. Refrigerate for a minimum of 1 hour before you eat it. Something happens when the dressing cools and settles in the fridge.

Enjoy!

Saturday, November 6, 2010

I’ll Have Some Carbs With That

Mashed Potato Pizza (Personal Size)

Preface Part 1: New Haven’s Apizza 

Recently I finished my Masters degree in New Haven which is a small city in Connecticut. If you know anything about New Haven you know it is famous for its pizza. Student food habits in grad school are, well, not so different from those of students in college.  With all of that information you now know that grad students in New Haven eat LOTS of pizza. Why am I telling you all of this? 

As a vegan I clearly didn’t eat pizza with my cohorts but I did listen to them talk about eating pizza quite a bit. Apparently in one New Haven apizza you can order something called Mashed Potato Pizza. I have never seen it but I pictured it in my head many a time.

Preface Part 2: MoFo Iron Chef

I have been following Vegan MoFo around the web and came across a game that some of the bloggers are playing which is a take-off on the Iron Chef television series. Of course I’ve heard of Iron Chef but I’ve never seen it so I looked it up. Basically the person running the game/program gives the chefs an ingredient and the chefs need to come up with the best dish utilizing that ingredient. Vegan MoFo Iron Chef’s week 1 ingredient is Mashed Potatoes. 

I think I’ve only ever made mashed potatoes once in my life.  Don’t get me wrong, I love potatoes in any format but, like many people, I love starches so I try to cut back in easy/obvious places. Potatoes are one of those places. Having little experience with mashed potatoes was what made me take the leap into joining in on the Iron Chef fun.

Preface Part 3: Put it all together and what do you get?
I made Vegan Mashed Potato Pizza. Adoi
______________________________________________

Recipe Part 1:  The Crust 

I made vegan Pizza in my first post and I used the same crust for this recipe.
 
1/4 tsp yeast
2 Tbsp warm water
1/4 tsp salt
1/4 tsp granulated vegan sugar
1 Tbsp warm water
1 tsp olive oil
1/2 c flour
(optional: corn meal…cause I’m from NY)

In a big bowl mix the yeast with the 2 tbsp warm water. Set aside for a few minutes. In a small bowl mix the salt, sugar, and 1 tbsp warm water. Add the salt/sugar mixture and olive oil into the big bowl. Stir to combine as well as possible. Add in flour and knead. If all of the flour isn't sticking you may need to add more water. A little water goes a long way. Cover the bowl with a wet dish towel or piece of saran wrap. Let stand for about an hour.

When you’re ready to assemble the pizza, toss a little corn meal on your rolling surface to keep the dough from sticking to it. Roll out the crust and roll the edges to make the crust. Brush a little olive oil on the pizza crust.

Recipe Part 2: Mashed Potatoes

3-4 Baby Red Potatoes (or similar size baking potato)
¼ tsp pressed garlic
1 tbsp vegan margarine (I used Earth Balance)
1 tbsp vegan sour cream (I used Tofutti)
¼ tsp rosemary
¼ tsp salt
¼ tsp onion powder
Very small dash of Dill (optional)

Peel and cut the potatoes into large chunks. Boil the potatoes in water for 15-20 minutes and drain. Place the potatoes back in the pot and mash with a potato masher or fork. Add the rest of the ingredients and mix thoroughly. Refrigerate to cool potatoes down before adding to the pizza.

Recipe Part 3: The Final Steps

Preheat your oven to 400°F. Once you have your crust rolled out, spread a layer of the mashed potatoes on the pizza.


Sprinkle your favorite vegan cheese on top.


Place the pizza on your stone or cookie sheet and place in the oven for about 20 minutes. Keep in mind each oven is different so start checking back on your pizza after 15 minutes.

Slice and Enjoy!


P.S. I wanted to wait until I was done to find out what the New Haven Apizza version of Mashed Potato pizza is. You know, the one my friends ate all the time.  I couldn't find any info online so I'll have to call a friend up to get the info. Will post back when I know more. Can't wait to see how it compares to my creation!

Friday, November 5, 2010

Remember Those Weird California Cow Commercials?

Veggie Burger


The easiest meal and a staple in any busy vegetarian's diet is the veggie burger. Add a side salad or side vegetable dish and you have yourself a nice quick and easy meal.

You would think that veggie burger producers would make their veggie burgers vegan but most aren't. So, read those ingredients carefully. Generally with veggie burgers you just have to watch out for milk and egg ingredients.

But I digress...for one of my favorite veggie burger combos, cook your personal favorite veggie burger as indicated on the package.  Toast up a whole wheat bun. Top your burger with a little vegan cheese and some avocado for a fresh tasting veggie burger. Other options would be to add lettuce, alfalfa sprouts, and a condiment such as an awesome vegan ranch dressing that you will be seeing a recipe on very soon...

Happy Vegan MoFo

I have been so busy I almost completely forgot about Vegan MoFo. For those of you unfamiliar with the granddaddy of all vegan forums, Post Punk Kitchen, you should check it out. It has long been one of my favorite sites. PPK started MoFo. Pieces snipped from the MoFo blog, here is the description of what Vegan MoFo is all about...

The idea is to write as much as you can all month, about vegan food. The blog entries can be about anything food related – your love of tongs, your top secret tofu pressing techniques, the first time your mom cooked vegan for you, vegan options in Timbuktu – you get the idea, right?

There aren’t strict guidelines for how often to write, but the idea is to shoot for every weekday, or about 20 times in the month.

As the world catches on that vegan food really is the best choice for animals (suck it, humane meat!), the planet (bite me, melting ice caps!) and people (piss off, heart disease!) let’s show them what vegan eating is all about.

Thursday, November 4, 2010

Healthy Chick'n and Rice


This is one of my staple dishes. It's low fat, high protein, and the right kind of carbs.  Pair it with your favorite steamed veggies and you have a great, healthy meal that cooks up in just minutes.  The recipe below is for one serving, you can easily multiply it by the number of servings that you need.

For each serving:
1/8 cup wild rice DRY (approximately 80 calories)
     - Of course you can use brown rice but I would stay away from white rice because it has little (if any) good nutritional value.

     - Cook the rice according to the directions on the package. I tend to start this as soon as I get home from work because in general, the longer it takes to cook the rice as stated on the package, the better the rice is for you.

Ingredients:
1 Chick’n cutlet of your brand of choice 
    - (I use Gardein chick’n scallopini – 90 calories, 2g fat, 14 g protein)
¼ vegetable bouillon cube or approximately 1/3-1/2 cup of vegetable stock
1 tsp vegan margarine (I use Earth Balance)
    - This adds about 3 grams of fat to the dish. In my opinion it is well worth it but you can leave it out if that is a major concern for you.
Splash of lemon juice
Dash of garlic powder

Optional: Lightly flour the chick’n cutlet.  Fry in a pan with about a tablespoon of oil. Of course it is tasty but I usually leave this part out when watching my waist-line. It’s a nice option if you’re cooking a special dinner for people.

Take the chick’n cutlet and place in a nonstick pan, flipping to heat each side. If you want you can add some olive oil to the pan to cook the cutlet in. When cooked through, set the cutlet aside on a plate.

Use the same pan and pour in your vegetable stock – or – ¼ bouillon cube + ¼ cup of water.  Boil the stock/cube down until the water has mostly disappeared and you’re left with a thicker brown “sauce”.

Turn the heat down to low. Add in your margarine, dash of garlic powder and a splash of lemon juice.
-        A note on garlic powder: most people are appalled that I use garlic powder instead of fresh garlic. Aside from it being easier…no cutting, no extra knives and dishes to wash, etc…garlic burns so easily. It tastes nice if it’s sautéed in oil but that’s just extra fat and calories, and of course extra effort!  So it’s not the worst thing in the world if you get home from work and want to use powder,  instead of fresh, that requires no effort, really, it’s not.

In a few seconds the margarine will be melted. Mix everything in the pan so that it is all incorporated well. Put your cutlet back in the pan and let it sit on each side for a little bit (maybe 30-60 seconds) to get some flavor into the cutlet.

This whole process (aside from the rice) takes about 10 minutes.

Take your fully cooked rice and place it on your plate. Take the cutlet and place it on top of the rice. Pour the remainder of your sauce over the chick’n and rice to let the rest of the sauce absorb a little bit into the rice.

Eat and enjoy!